Table of Content
Share this article
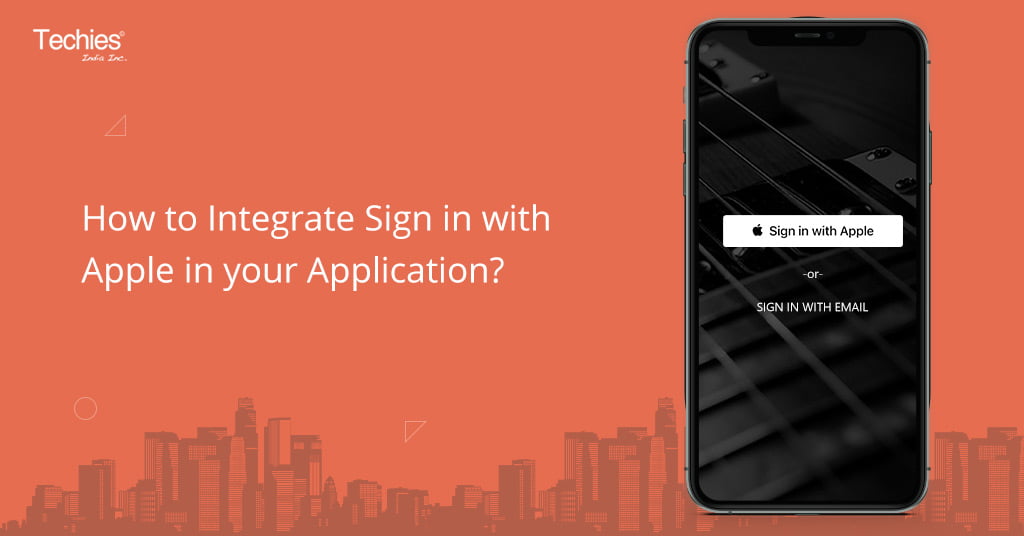
How to Integrate Sign in with Apple in your Application?
What is the feature called Sign In with Apple?
With iOS 13, Apple has provided us with a fast and secure method to easily sign in to apps & websites using Apple ID. Things you no longer have to do :-
- Filling lengthy registration forms
- Wait for the approval of account verification
- Set and confirm passwords
It simply provides users totally new and quicker sign in experiences.
Where does it work?
Displaying “Sign In with Apple” or “Continue with Apple” Button on apps and websites means you can allow your users to sign in from anywhere. It works on iOS, MacOS, tvOS, watchOS and any browser. There are a number of use cases, which allows users to
- sign in early in the app when there is limited functionality.
- sign in later, after interacting with features of the app such as making purchases.
- delayed sign in to let the user familiarize with features of the app.
- sign in or re-authenticate for existing accounts.
Above mentioned use cases are part of Human Interface Guidelines. Considering these you may display a brief of how this feature will benefit them.
Pro Tip 1: Before implementing this feature into your app, you must refer to App Store review Guidelines to look out for the scenario in which their app falls.
Pro Tip 2: Support is also available for apps and games developed in Unity (Package is there on Unity Asset Store).
How Signing In with Apple ID is more secure?
- Once signed in, persistence of this Id will let you re-authenticate with Face ID or Touch ID every time you access the app.
- Sign-in with Apple helps you in tracking frauds. As this feature uses on device machine learning which can identify if the user is a real person or not.
- Keeping the privacy of users in mind, Apple provides “Email relay service”. Using this service, users can keep their email addresses private.
- Apart from this, Two factor authentication on Apple ID keeps your account protected.
How does two factor authentication work?
As an Apple user, you must be aware of the accessibility of account. You can access the particular Apple ID on trusted devices only. On each of the device when you sign in with Apple ID, it asks for two pieces of information i.e. Password of Apple ID and second is a 6 digit verification code. This code will be displayed automatically on other trusted devices. If you don’t have multiple Apple devices, you have the option to set your phone number as a trusted one in your Apple ID account settings. Following this you can receive verification code as a text message. This is how code verification improves the security over each platform of Apple.
What do you need to understand about Sign in with Apple REST API?
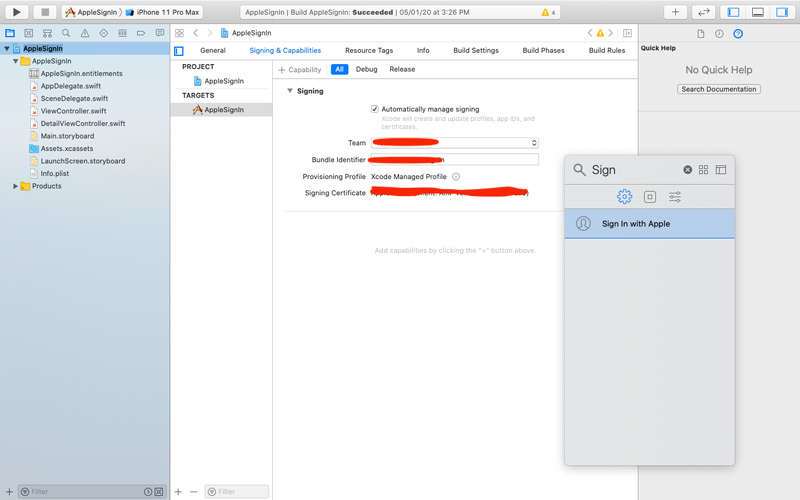
- Enable Capability of “Sign In with Apple” in your Xcode Project.
Following are the steps to enable in latest Xcode:-
a) In your Xcode Project -> Select Project Targetb) Add Capability by clicking “+” button
c) Look for “Sign in with Apple” capability.
d) Double click or drag the capability to add.
2. Set up Sign-in functionality – Following are the steps to follow
a) import AuthenticationServices
b) Add Sign In Button either by taking it as custom button i.e.
let button = ASAuthorizationAppleIDButton()
button.addTarget(self, action: #selector(appleIDButtonTapped), for: .touchUpInside)
self.stack.addArrangedSubview(button)
Or Make an Outlet of UIButton and in the Inspector mention the Class as ASAuthorizationAppleIDButton
c) Next step is to make a request to ASAuthorizationAppleIDProvider where you have to first initialize a request variable and define requested scopes.
(Requested scope means the information that will be requested from the user and app authorization will be based on these scope parameters only.)
After this, initialize a controller of type ASAuthorizationController passing the initialized request and conform to delegate ASAuthorizationControllerDelegate.
let signInRequest = ASAuthorizationAppleIDProvider().createRequest()
signInRequest.requestedScopes = [.fullName, .email]
let controller = ASAuthorizationController(authorizationRequests: [signInRequest])
controller.delegate = self
controller.presentationContextProvider = self
controller.performRequests()
3. After the successful sign in, didCompleteWithAuthorization will be called as follows
func authorizationController(controller: ASAuthorizationController, didCompleteWithAuthorization authorization: ASAuthorization) {
if let appleIDCredential = authorization.credential as? ASAuthorizationAppleIDCredential{
let userIdentifier = appleIDCredential.user
let fullName = appleIDCredential.fullName
let email = appleIDCredential.email
print(userIdentifier)
print(fullName)
print(email)
//You can save the information here as per your requirement
}
else if let password = authorization.credential as? ASPasswordCredential{
let username = password.user
let password = password.password
print(“\(username) \(password)”)
}
}
4. You can handle error using didCompleteWithError method
func authorizationController(controller: ASAuthorizationController, didCompleteWithError error: Error) {
print(error)
}
With the above 4 steps, Sign in with Apple is Complete.
Pro Tip :- In addition to the implementation of the above feature in your app, if you want to save and fetch user identity then following is the solution
func save() {
let encoder = JSONEncoder()
if let encoded = try? encoder.encode(self.userIDInfo) {
let defaults = UserDefaults.standard
defaults.set(encoded, forKey: “userId”)
}
}
func get() -> String{
let defaults = UserDefaults.standard
if let savedId = defaults.object(forKey: “userId”) as? Data {
let decoder = JSONDecoder()
if let loadedId = try? decoder.decode(userInfo.self, from: savedId) {
return loadedId.id
}
}
return “”
}
In order to use the above two functions, declare UserInfo structure and initialize variable for the same structure to access it in your Controller class.
//Structure
struct userInfo: Codable{
var id: String
}
//Initializing the structure
var userIDInfo : userInfo!
Integration of Sign In with Apple in SwiftUI
The only difference between the integration of Sign in with Apple in Swift and SwiftUI is that you have to wrap up its view yourself, Apple does not provide that.
In this case, usage of UIViewRepresentable is the solution.
Below, you can see How to implement this
ContextView.Swift – This is the SwiftUI Class in which you will set the button UI and method that has to be performed on “Tap Gesture” of the “Sign In with Apple” Button.
struct ContentView: View {
@State var appleSignInDelegates: SignInWithAppleDelegates! = nil // Initialized variable to Delegate class that handle AuthorizationService Delegates
var body: some View {
VStack{
SignInWithApple()
.frame(width: 280, height: 60)
.onTapGesture(perform: showAppleLogin)
}
}
private func showAppleLogin() {
let signInRequest = ASAuthorizationAppleIDProvider().createRequest()
signInRequest.requestedScopes = [.fullName, .email]
let controller = ASAuthorizationController(authorizationRequests: [signInRequest])
controller.delegate = appleSignInDelegates
controller.presentationContextProvider = appleSignInDelegates
controller.performRequests()
}
}
View Class – SignInWithApple.swift : This view class lets you wrap the ASAuthorizationAppleIDButton which is not provided by Apple as such.
final class SignInWithApple: UIViewRepresentable {
func makeUIView(context: Context) -> ASAuthorizationAppleIDButton {
return ASAuthorizationAppleIDButton()
}
}
Delegate Class – SignInWithAppleDelegates : In this class you will define Completion and Error handlers.
class SignInWithAppleDelegates: NSObject,ASAuthorizationControllerDelegate, ASAuthorizationControllerPresentationContextProviding {
private weak var window: UIWindow!
func presentationAnchor(for controller: ASAuthorizationController) -> ASPresentationAnchor {
return self.window!
}
func authorizationController(controller: ASAuthorizationController, didCompleteWithAuthorization authorization: ASAuthorization) {
if let appleIDCredential = authorization.credential as? ASAuthorizationAppleIDCredential{
let userIdentifier = appleIDCredential.user
let fullName = appleIDCredential.fullName
let email = appleIDCredential.email
print(fullName)
print(email)
}
else if let password = authorization.credential as? ASPasswordCredential{
let username = password.user
let password = password.password
print(“\(username) \(password)”)
}
}
func authorizationController(controller: ASAuthorizationController, didCompleteWithError error: Error) {
print(error)
}
}
Hope this blog was helpful to you. Enjoy development and for any support/queries please feel free to connect with us at Contact Us.
Share this article
Is your Development team costing you a fortune?
We deliver practical and profitable solutions to your scaling needs.


